
What is shoring? A guide to shoring posts and excavation safety
Shoring is the temporary support system contractors install to prevent soil, structures, or concrete from collapsing during construction, excavation, or repair work. At the core of most shoring systems is the shoring post — a load-bearing prop that holds weight above while work proceeds below or alongside it. Understanding how shoring posts work, when to use them, and when to remove them is fundamental to running a safe, compliant job site.
What is a shoring post?
A shoring post is an adjustable vertical prop — typically steel or aluminium — used to temporarily support floors, formwork, beams, or trench shields (walls) during construction or structural repair. Also called a prop, acrow prop, or post shore, these devices telescope to fit varying heights and are locked in place with a pin or collar to carry compressive loads.
Most steel shoring posts range from about 1.0 m to 4.8 m in extended height and are rated to carry anywhere from 15 kN to over 60 kN depending on the model, height, and manufacturer specifications. Aluminium versions are lighter and favoured where workers need to reposition props frequently.
What are shoring posts used for?
Shoring posts are used wherever a structure needs temporary vertical support to remain stable while permanent supports are absent, removed, or curing.
Common applications include:
- Formwork support — holding soffit forms and falsework in place while concrete is poured and cures overhead
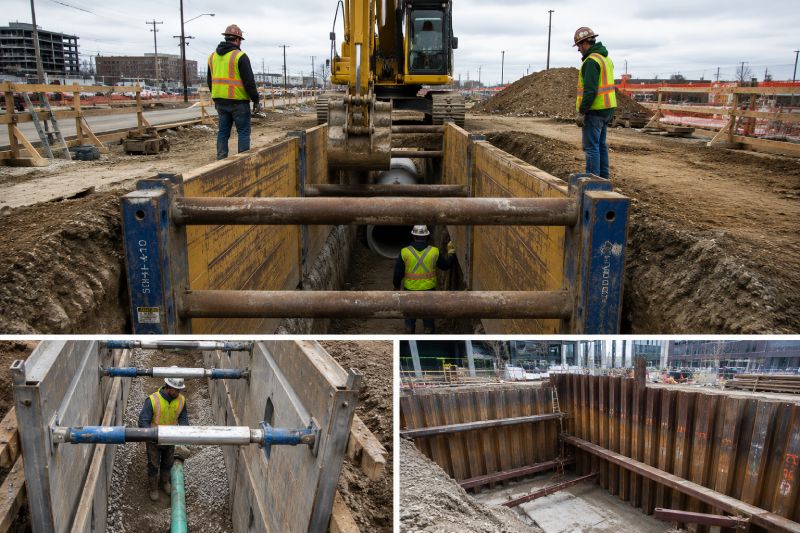
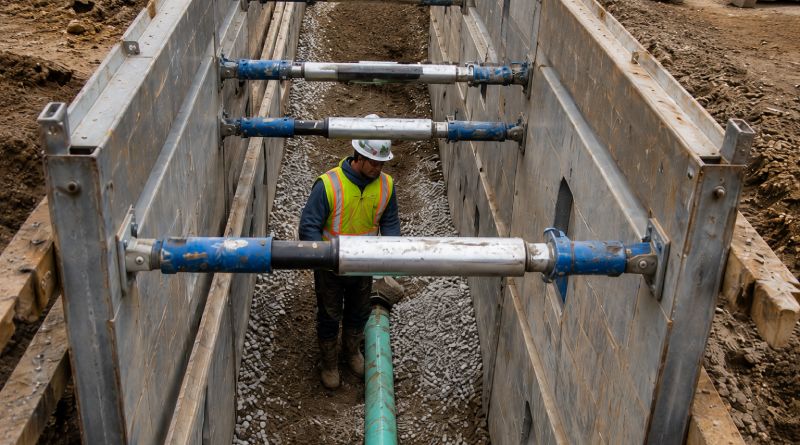
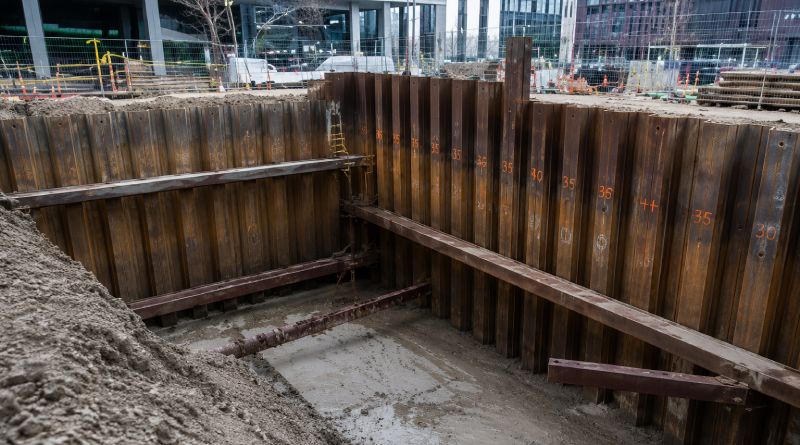
- Shoring excavation walls — supporting trench boxes or lagging walls to prevent cave-in on open-cut excavations
- Structural underpinning — propping floors or beams while foundation work, wall removal, or structural modification takes place below
- Slab and beam repair — maintaining load paths during concrete demolition or remediation
- Multi-storey reshoring — stacking loads through multiple floors so freshly poured slabs do not carry premature weight
In shoring excavation contexts specifically, post shoring is often combined with horizontal walers and trench boxes to create a full lateral support system that protects workers from soil movement.
How to use a shoring post
Setting a shoring post correctly takes less than five minutes per prop, but the preparation and load planning that precedes placement is where the real work happens.
Step-by-step setup:
- Assess the load — Determine the dead load (formwork, concrete, structure) and any live loads (workers, equipment) the post must carry. This drives post selection and spacing.
- Prepare the base — The post must bear on a solid, level surface. Use a base plate or timber sole board to spread the load and prevent the foot from punching into soft ground or an unfinished slab.
- Extend to height — Collapse the post, position it under the bearing point, then extend the inner tube until the head plate contacts the soffit, beam, or waler firmly. Do not extend beyond the manufacturer’s rated extension length.
- Lock it — Insert the securing pin through the inner tube holes and engage the threaded collar. Both locking mechanisms should be engaged — never rely on just one.
- Check plumb — A shoring post that is off vertical transfers eccentric load and reduces its rated capacity significantly. Use a level on two axes.
- Install at correct spacing — Space posts per your shoring design. Never improvise spacing on-site without engineering sign-off.
How to calculate posts for shoring
The number of posts required is determined by dividing the total load area by the safe working load (SWL) of a single post at its installed height.
Basic formula:
Number of posts = Total load (kN) ÷ SWL per post (kN)
For concrete formwork, a common starting point is to calculate slab load as:
Load (kN/m²) = Slab thickness (m) × Concrete density (typically 24 kN/m³) + construction live load (typically 1.5–2.5 kN/m²)
For example, a 250 mm slab generates roughly 6 kN/m² dead load. Add 2 kN/m² live load and you have 8 kN/m² to support. If your posts are rated at 24 kN each at the required height and your grid spacing is 1.5 m × 1.5 m (2.25 m² per post), each post carries 8 × 2.25 = 18 kN — within the 24 kN SWL.
Always: – Use the manufacturer’s load table at the actual installed height, not the maximum rated height – Apply a safety factor as required by your local standard (AS 3610, BS EN 1065, or equivalent) – Have a structural engineer verify the design on any non-standard application
Spacing grids of 1.2 m to 1.8 m centres are typical for standard slab formwork, but this varies significantly with slab thickness, post capacity, and secondary bearer size.
Can a shoring post prop up a sinking floor?
Yes — shoring posts are routinely used to stabilise a sinking or deflecting floor while permanent repairs are carried out underneath, but this must be approached as a structural intervention, not a DIY fix.
In practice, the process involves:
- Identifying the cause of the sinking (failed bearer, deteriorated stumps, subsidence)
- Installing shoring posts from below — or from above through the floor in some configurations — to arrest movement and transfer load to a stable bearing point
- Executing the permanent repair (replacing stumps, injecting grout, installing new bearers)
- Removing props only after the repair has achieved full load-bearing capacity
Critical caution: if a floor is sinking due to ongoing foundation movement or soil subsidence, shoring posts address the symptom, not the cause. A geotechnical or structural engineer must assess the underlying issue before any propping work starts. Overloading a single post by concentrating a deflected slab’s load on one prop without calculating the reaction force is a serious risk.
When to remove shoring posts
Shoring posts should be removed only after the structure they are supporting can safely carry the intended load independently — not before.
Removing props too early is one of the most common causes of formwork collapse and structural failure on construction sites. The timing depends entirely on what is being shored.
When to remove concrete shoring posts
Concrete shoring posts — props supporting freshly poured slabs or beams — must remain in place until the concrete has reached sufficient strength to carry its own weight plus any imposed loads without the props.
Key rules:
- Never remove based on time alone. Curing time depends on mix design, ambient temperature, cement type, and slab thickness. A standard 32 MPa mix in warm conditions may reach 75% of design strength in 7 days; the same mix in cold weather can take significantly longer.
- Use cylinder or cube test results. The standard approach is to strip formwork once concrete test cylinders (cured alongside the pour) reach a minimum of 75% of the specified 28-day compressive strength — or as directed by the structural engineer of record.
- Shoring for concrete operations should be left in place until the engineer’s de-propping sequence is followed. On multi-storey construction, this typically means maintaining at least one or two floors of reshoring below the active pour floor to distribute loads through partially cured slabs.
- De-prop in sequence. Remove props from the centre of a span outward, or per the sequence specified in the formwork design. Removing edge props first can induce cantilever moments the slab is not yet able to resist.
- Inspect before striking. Before removing any prop, confirm there are no visible cracks, deflection, or signs of distress in the concrete above.
As a general rule for residential suspended slabs: minimum 7 days for one-way slabs with standard mixes in warm conditions, 14 days or more for two-way slabs or thicker elements. In commercial and industrial construction, always follow the structural engineer’s documented stripping schedule — no exceptions.
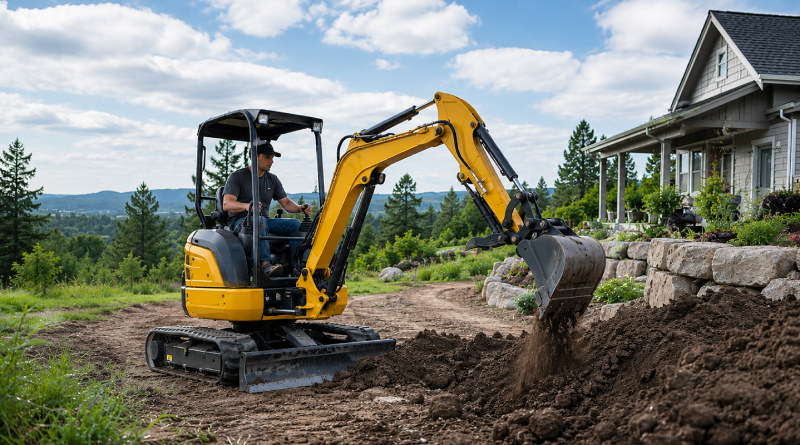 |
Choosing the best mini excavator for personal use |


Ritchie Bros. is a one-stop-shop for everything your equipment and truck business needs to succeed - buying and selling solutions, market insights and valuation, global buyer demand, and fleet management tools.
Ritchie Bros., Two Westbrook Corporate Center, Suite #1000 Westchester, Illinois, 60154 | +1.800.663.8457